1. Choose a suitable place to study
It is not the technology that comes first, but a pedagogical question: Is there a real-life location whose spatial or situational characteristics are important for understanding the course content?
Suitable examples include: technical facilities, production sites, building sites, laboratories, historic buildings, museums and exhibitions, architecturally significant spaces, landscapes and geographical locations, urban spaces, medical or care-related learning environments, social institutions, pilot plants or research facilities.
Virtualisation is particularly useful when the physical location cannot be visited at will or cannot accommodate large groups of students.
The „360° Bildung“ platform demonstrates, through what are now numerous virtual tours, that the principle can be applied beyond the original context of environmental engineering. The examples available there range from technical facilities and urban neighbourhoods to research sites and the Bauhaus context. [https://www.uni-weimar.de/de/bau-und-umwelt/forschung/projekt-360-bildung/]
2. Determine the method of use in teaching
One key lesson learnt from using these environments is that there isn’t just one 360° tour. The same virtual space can be used in a wide variety of teaching and learning scenarios.
Option A: Individual virtual field trip as homework:
Students explore the town on their own before or after a lecture.
This version is particularly suitable for The flipped classroom and self-study.
Possible tasks:
- find specific objects,
- Document observations,
- Answer questions,
- Explaining connections,
- process a work order,
- Submit your results to Moodle afterwards.
Option B: Independent exploration during the course
During a face-to-face or online session, students are given time to explore the environment independently. Their observations and any unanswered questions are then discussed as a group.
This variant is suitable, for example, for activation between two input phases.
Option C: Lecturer-led virtual field trip
The teacher guides the group through the virtual location and explains relevant points – much like a traditional guided tour.
Students can ask questions and discuss their observations. This is a very accessible option, particularly for a first attempt, as it does not require any complex learning activities to be prepared.
Option D: Guided exploration with embedded learning resources
Information is integrated directly into the tour. Hotspots may include, for example:
- Explanatory texts,
- Detailed images,
- Diagrams,
- Videos,
- Audio files,
- Original documents,
- Further links,
- Review questions or quizzes.
This transforms a simple documentation of the location into a structured learning environment. It is precisely this combination of realistic panoramas and educational annotations that has been described in the research on 360° VR spaces as a key design opportunity. [https://www.researchgate.net/publication/376488310_360_VR_Spaces_in_Teaching_Creation_and_Application])
Option E: Group work
Several learners work together on a task. For example, different groups could examine different parts of a system and then combine their findings.
The technical environment does not necessarily have to support multi-user functionality itself: students can explore a virtual tour together on a single screen or navigate it in parallel whilst discussing their observations.
Option F: Social VR
Advanced systems enable several learners to, at the same time in the same virtual space to be present. They are represented by avatars, can talk to one another and explore objects and information together.
Research into social VR-based virtual field trips highlights the potential of combining virtual excursions, social presence and collaborative learning; at the same time, this gives rise to additional technical and pedagogical requirements. [https://www.researchgate.net/profile/Heinrich-Soebke/publication/387174904_Combining_360_Spaces_and_Social_VR/links/68c2596607fc6b0e2543ee46/Combining-360-Spaces-and-Social-VR.pdf]
This version is therefore ideal for beginners not required – rather, it demonstrates how an existing 360° virtual tour can subsequently be expanded into a collaborative learning space.
Option G: 360° Educational Escape Room
A tour can turn into a virtual escape room are generated. Information in the space becomes clues from which learners must deduce solutions. Only once a task has been successfully completed does the next step or section become accessible.
The advantage is that it is not just about looking at information. Learners must consciously explore their surroundings, link pieces of information together and solve problems. 360°-based educational escape rooms have already been trialled in the project as a low-threshold form of game-based learning; the 360° environment can be combined with web-based tasks. [https://files.eric.ed.gov/fulltext/EJ1434160.pdf]
Option H: Independent field trip with a digital learning guide
In a self-directed virtual excursion, there is no teacher to whom learners can spontaneously direct their questions. One possible way to enhance the experience is therefore to AI-based learning assistant.
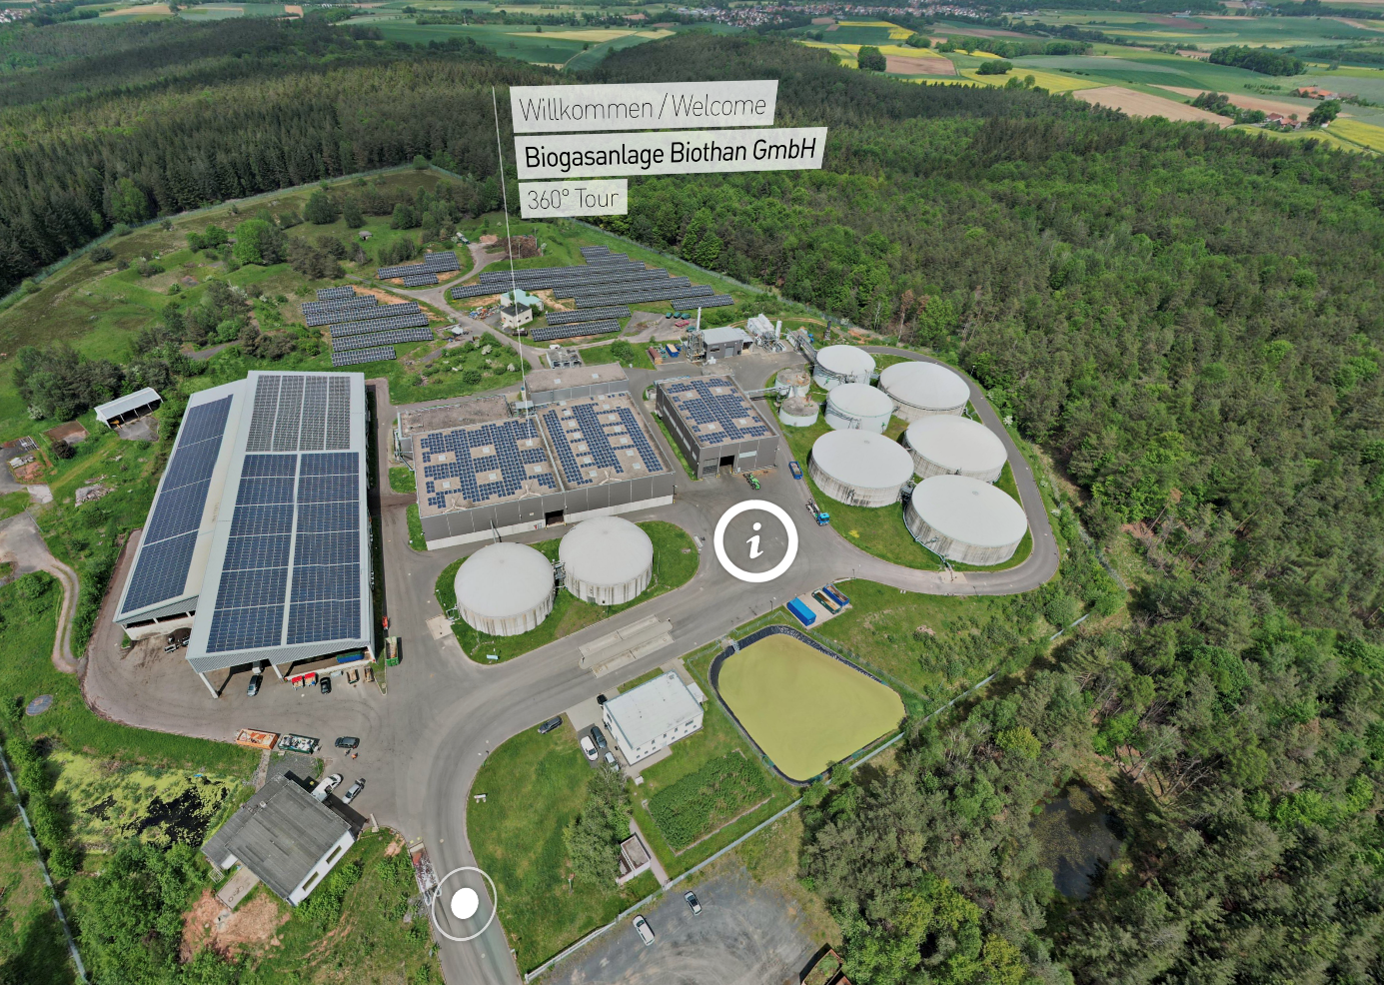
For example, the combination of a 360° tour of a biogas plant with a RAG-based chatbot was tested. This chatbot draws on a curated knowledge base and can answer questions about the location being shown during the tour. In the pilot study involving ten participants, the combination was examined in terms of knowledge acquisition, motivation, cognitive load and usability; the results demonstrate the potential of such support, but at the same time make it clear that the chatbot should be designed as a supplementary tool. [https://ieeexplore.ieee.org/document/11366732 ]
For standard 360° learning scenarios, a chatbot of this kind is no prerequisite, but rather a possible further development.
3. Create your own tour
If you are looking to digitise your own learning space, a step-by-step approach has proved effective.
– Define learning objectives and the subject of study
Before admission, the following should be clarified:
- What are the learners expected to recognise or understand?
- Which parts of the town are relevant in this regard?
- Which areas are not relevant?
- What additional information do the learners need?
This prevents us from simply taking in as much as possible and only thinking about what to do with it later.
– Plan a tour
The individual camera positions are determined. When doing so, it is important to consider the perspective of the future users: Where would they stand? Which objects need to be visible? How do they move from one point to the next?
– Create 360° images
The recording process itself is relatively straightforward, as a 360° camera captures the entire surroundings at once. Experience gained from creating eleven early 360° models shows that the recording as a couple A particularly effective approach: one person operates the camera, whilst the other follows the shooting plan and records the camera positions. (ResearchGate)
– Put together a tour
The panoramas are then combined using proprietary software to create a virtual tour. Navigation elements guide users, for example, from one room to the next or between different areas of a facility.
– Enhance the teaching approach
Relevant points are then accompanied by information and learning activities. A 360° model thus evolves from a virtual tour into a a learning environment designed with teaching in mind.
– Testing
Before the operation, the route should be tested by people who are unfamiliar with the actual location. Particular attention should be paid to:
- Is the navigation clear?
- Are learners able to find the relevant information?
- Is it clear what needs to be edited?
- Is there any unnecessary or distracting content?
- Are the text and media easy to read?
- Is the scope in line with the planned timeframe?
Experience gained from developing several generations of virtual tours shows that the process can be approached step by step: even the creation of an initial model provides insights that make it considerably easier to produce further models.
The following link describes how to create a 360° environment: [https://dl.gi.de/handle/20.500.12116/39940]